Saturday, April 20, 2013

Tech comes Together in Perfect Harmony

Bringing it Together 

I always get questions about what is the best tool to use.  Should we use Edmodo or Moodle?  Should I use LittleBirdTales or iMovie?  Should I use Google Drive or Dropbox?  Well, it all depends on what you need to do.  Sometimes, it is best to know a little bit about each of these programs and than some.  

With my recent adventures with technology, I found I needed to use several platforms.  To fit my needs, I used iMovie, ScreenFlow, YouTube, Vimeo, and Edcanvas.  I wanted to create videos to walk teachers and students through "how-to" use iMovie, and I didn't want to record a 20 minute screencast.  So, I decided to film 11 brief screencasts to share how-to perform basic tasks in iMovie.  

Then, I wanted to house all of these videos in one location rather than at their individualized web addresses at YouTube.  This is where Edcanvas swoops in to save the day.  Edcanvas can create one web address with several videos all placed in sequential order to access information "just-in-time."  So, with the share button in Edcanvas, I can send everyone a link to these iMovie tutorials through one easy-to-share web address.   

I also created a version of using Vimeo in addition to the YouTube videos.  Why would I do this?  Well, most schools block YouTube videos from being viewed, but Vimeo is usually open on student networks.  So, I uploaded them on Vimeo so that most students could view the videos as needed through Edcanvas.  Just don't tell students about Vimeo.  If they play the videos directly from Edcanvas, they will be none the wiser.  

iMovie for Classroom Projects 

iMovie is a movie editing software for the Macs.  iPad users can also enjoy the features and tools associated with the iMovie app.  iMovie is a perfect tool for students to use with final classroom projects.  Whatever the content, the iMovie application allows students to present information in a creative format.  Here are eleven videos to learn some iMovie basics.  

Thursday, April 11, 2013

Technology to the Rescue: PBL Book Club

Project-Based Learning


If you are looking for a great book to get start implementing Project-Based Learning, the book above entitled---PBL in the Elementary Grades: Step-by-Step Guidance, Tools and Tips for Standards-Focused K-5 Projects!  The Buck Institute for Education setup and wrote this book in an easy-to-read, no-nonsense approach to Project-Based Learning.

One of the elementary schools I work at started an impromptu book club with this book.  Each teacher, involved in the book club, was assigned a chapter.  However, I had a time and place conflict.  I was holding a workshop after school at another building and couldn't be at both commitments.  So, this is where technology came to my rescue.

I was trying to think of the best way to provide teachers with an overview of this chapter, but I wanted to do something new.  Because I like to play with tech that has instructional potential, I started my search.  Normally, Twitter will provide a few pearls of wisdom, but that day the inspiration came from Google+.  It was the first post staring back at me in my Google+ account.

It was Tony Vincent's infographic entitled iPad as the Teacher's Pet, which is awesome to say the least.  With this guide Tony shared a variety of information on the iPads as a learning tool (aka Teacher's Pets).  I asked him what program he used and astonishing to me he said Pages.  I don't know why, but it was one of those Aha! Moments.  It never dawned on me that Pages could be used to design and develop an infographic.

If you scroll through the document below, you will notice that there are no page breaks, which is common among infographics.  Instead, it is just one continuous page for 44 inches rather than the standard 11 inches per page.  So, here is my first Pages designed infographic on managing a PBL project.  I created it one night after work for the fun of it, and I was fairly proud of it even if it is a mediocre design.


How-to Start an Infographic in Pages

Here is how I changed the page length of a Pages document to create the above document:


Check out How to Create an Infographic in Pages by Hoosier Teacher on Snapguide.

Sunday, April 7, 2013

3 Topics to Promote Digital Literacy


Searching Google is a skill and I would claim it is as important as many reading skills being taught today.  Many teachers are engaging students in a more project-based approach to learning.  As a result, students have to locate information on topics they are studying.  

Finding "Just Right" Sites: 
If students are researching a topic, it is crucial that they are locating age-appropriate sites.  It's like a Goldilock test.  Students need to be able to tell when a website is...
  1. Too difficult, 
  2. Too easy, or
  3. Just right 
I might provide students with a rule similar to discarding difficult books.  For instance, if the first paragraph has 3 or more unknown words, this website is might be too difficult.  Of course, I wouldn't want you to say, "Get out of this website immediately!"  But, it at least gives students the thought that if this site is too difficult to understand; I shouldn't use it.

To help guide students to kid-related sites,  have students use the phrase "for kids" within their search.  Additionally, Google has a search filter that allows you to search for "easier" reading levels for students.  No, you cannot search websites for their associated Fountas & Pinnell reading levels, but it gives you the choice of easy, moderate, or advanced reading materials.  Refer to the image for accessing the Reading Levels search filter (Disclaimer: Google likes to move things around; so, this is where the reading level search filter was the day this post was published.)
Google Reading Level Search Filter


Search Suggestions: 
First, teach your students basic searching tips.  Engage students in digital literacy skills by providing practice with searching.  It really is a skill to effectively search for specific topics and using keywords will usually eliminate unwanted websites.  Google's Search Education lessons will help even the most novice searcher, but there are advanced search tips for the Google Ninjas.

Take the Google-A-Day challenge...

Reliable or Not:
Next, I would focus on teaching students how to spot reliable/unreliable websites.  Check out the these Edcanvas resources and see if you or your students can spot unreliable websites: 
  1. Spot the Unreliable Website 1
  2. Spot the Unreliable Website 2
Have students use a checklist to evaluate a site's reliability.  NetSmartz has a decent evaluation tool on their site.  Their evaluation tool looks carefully at the website, the author, and the information.

These are lessons that should be iterative and not a one time process.  Instead, whenever you, as a teacher, see the need for lessons on finding just-right sites, searching the web, or determining a site's reliability, just intertwine these topics within one of the projects you are completing within your classroom.  


URL Shortener


Setting: Teacher in the Computer Lab


Student A: Mr. Gibson this website isn't working!
Mr. Gibson: Did you type it in correctly? 
Student A: Yes, I tried everything!
Mr. Gibson: You typed in .con not .com. Try it again.  
Student B: Mr. Gibson this website isn't working!
Mr. Gibson: Argh!


URL Shortener in the Classroom


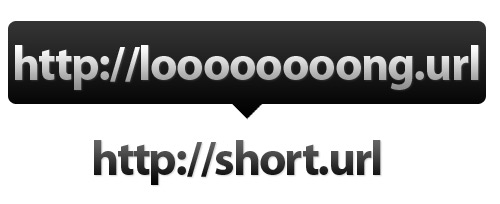
Are you tired of watching students mistype long web addresses?  Shorten them with a URL shortener.  I feel like I'm writing the intro to an infomercial.  Here is an example of a URL Shortener's benefits.  Take a look at this long Google Docs URL: 
Even your most tech-savvy student would struggle with this Google Docs web address.  Now try the next two shortened web addresses (*an additional resource can be found by clicking either one of the following links):

Short List of Shorteners

Additional Benefit and One Warning


There are some URL shorteners that allow for tracking.  For instance, if you gave parents a shortened URL at parent teacher conferences and wanted to check how many parents actually accessed the link, it could be done with Owl.ly.  

I will warn that some shorteners may be blocked by your web-filter; however, I know TinyURL, goo.gl, and Owl.ly work.  Many other URL shorteners were blocked by my school districts web-filter, but don't let that discredit the idea behind using shorteners.  Try it the next time your students have to go to a long and overly complicated web address.

For another alternative similar to using a shortener, check out my post on QR codes.  

Tuesday, March 26, 2013

Web Searching

I created this slideshow to introduce fifth grade students to effective web search tips.  At the end of the brief presentation, I had students practice what they learned with a few Google-A-Day challenges.  I gave students a specified time-limit and a post-it-note.  They were asked to search and show (not tell) me the answer they wrote on the post-it-note.  After the time limit was up, students answers were collected and posted on the board to discuss.  We then reviewed what students did to get the fastest and most accurate search results.  The students practiced searching two more Google-A-Day challenges and  again we reflected on their techniques and search results.  Last, the students applied the search tips and techniques with their individualized research projects.